


216 / 142 Einbauanleitung VW Golf 1 Cabrio Caddy 14d Jetta auf die G60 Bremsanlage

Installation instructions: Brake calliper adapter for conversion to G60 brakes - perfect fit for Golf 1, Golf 1 Cabrio, Caddy 14d, Jetta 1 & Scirocco
Introduction & Benefits:
The conversion to the G60 brake system offers an optimal solution for improved braking performance on older VW models such as the Golf 1 and its derivatives. By using the Epytec brake caliper adapter, the powerful 280 mm brake of the G60 model can be adopted, which not only increases safety, but also increases cost efficiency as existing components can be utilised. Another advantage is that it can be retrofitted, which means that the vehicle can be restored to its original condition if required.
Tools & materials:
You will need the following tools and materials for the conversion:
Ratchet with suitable nuts (especially 13 and 15 mm)
Torque spanner for precise tightening of the screws
Screw lock (e.g. medium-strength Loctite 243)
Wire brush or sandpaper for cleaning the contact surfaces
Rubber mallet for carefully loosening stuck parts
Brake cleaner for cleaning the components
Collecting container for any escaping brake fluid
Safety goggles and gloves for personal safety
Step-by-step instructions:
1.Preparation:
Place the vehicle on a level surface and secure it against rolling away. Raise the front axle and support the vehicle with jack stands. Remove the front wheels to gain access to the brake system.
2.Dismantling the old brake system:
Loosen the fixing screws of the brake calliper with a 13 mm spanner and carefully remove the brake calliper from the steering knuckle. Suspend the brake calliper using a suitable hook to avoid tension on the brake line. Then remove the brake calliper carrier by loosening the fastening screws with a 15 mm socket. Remove the brake disc.
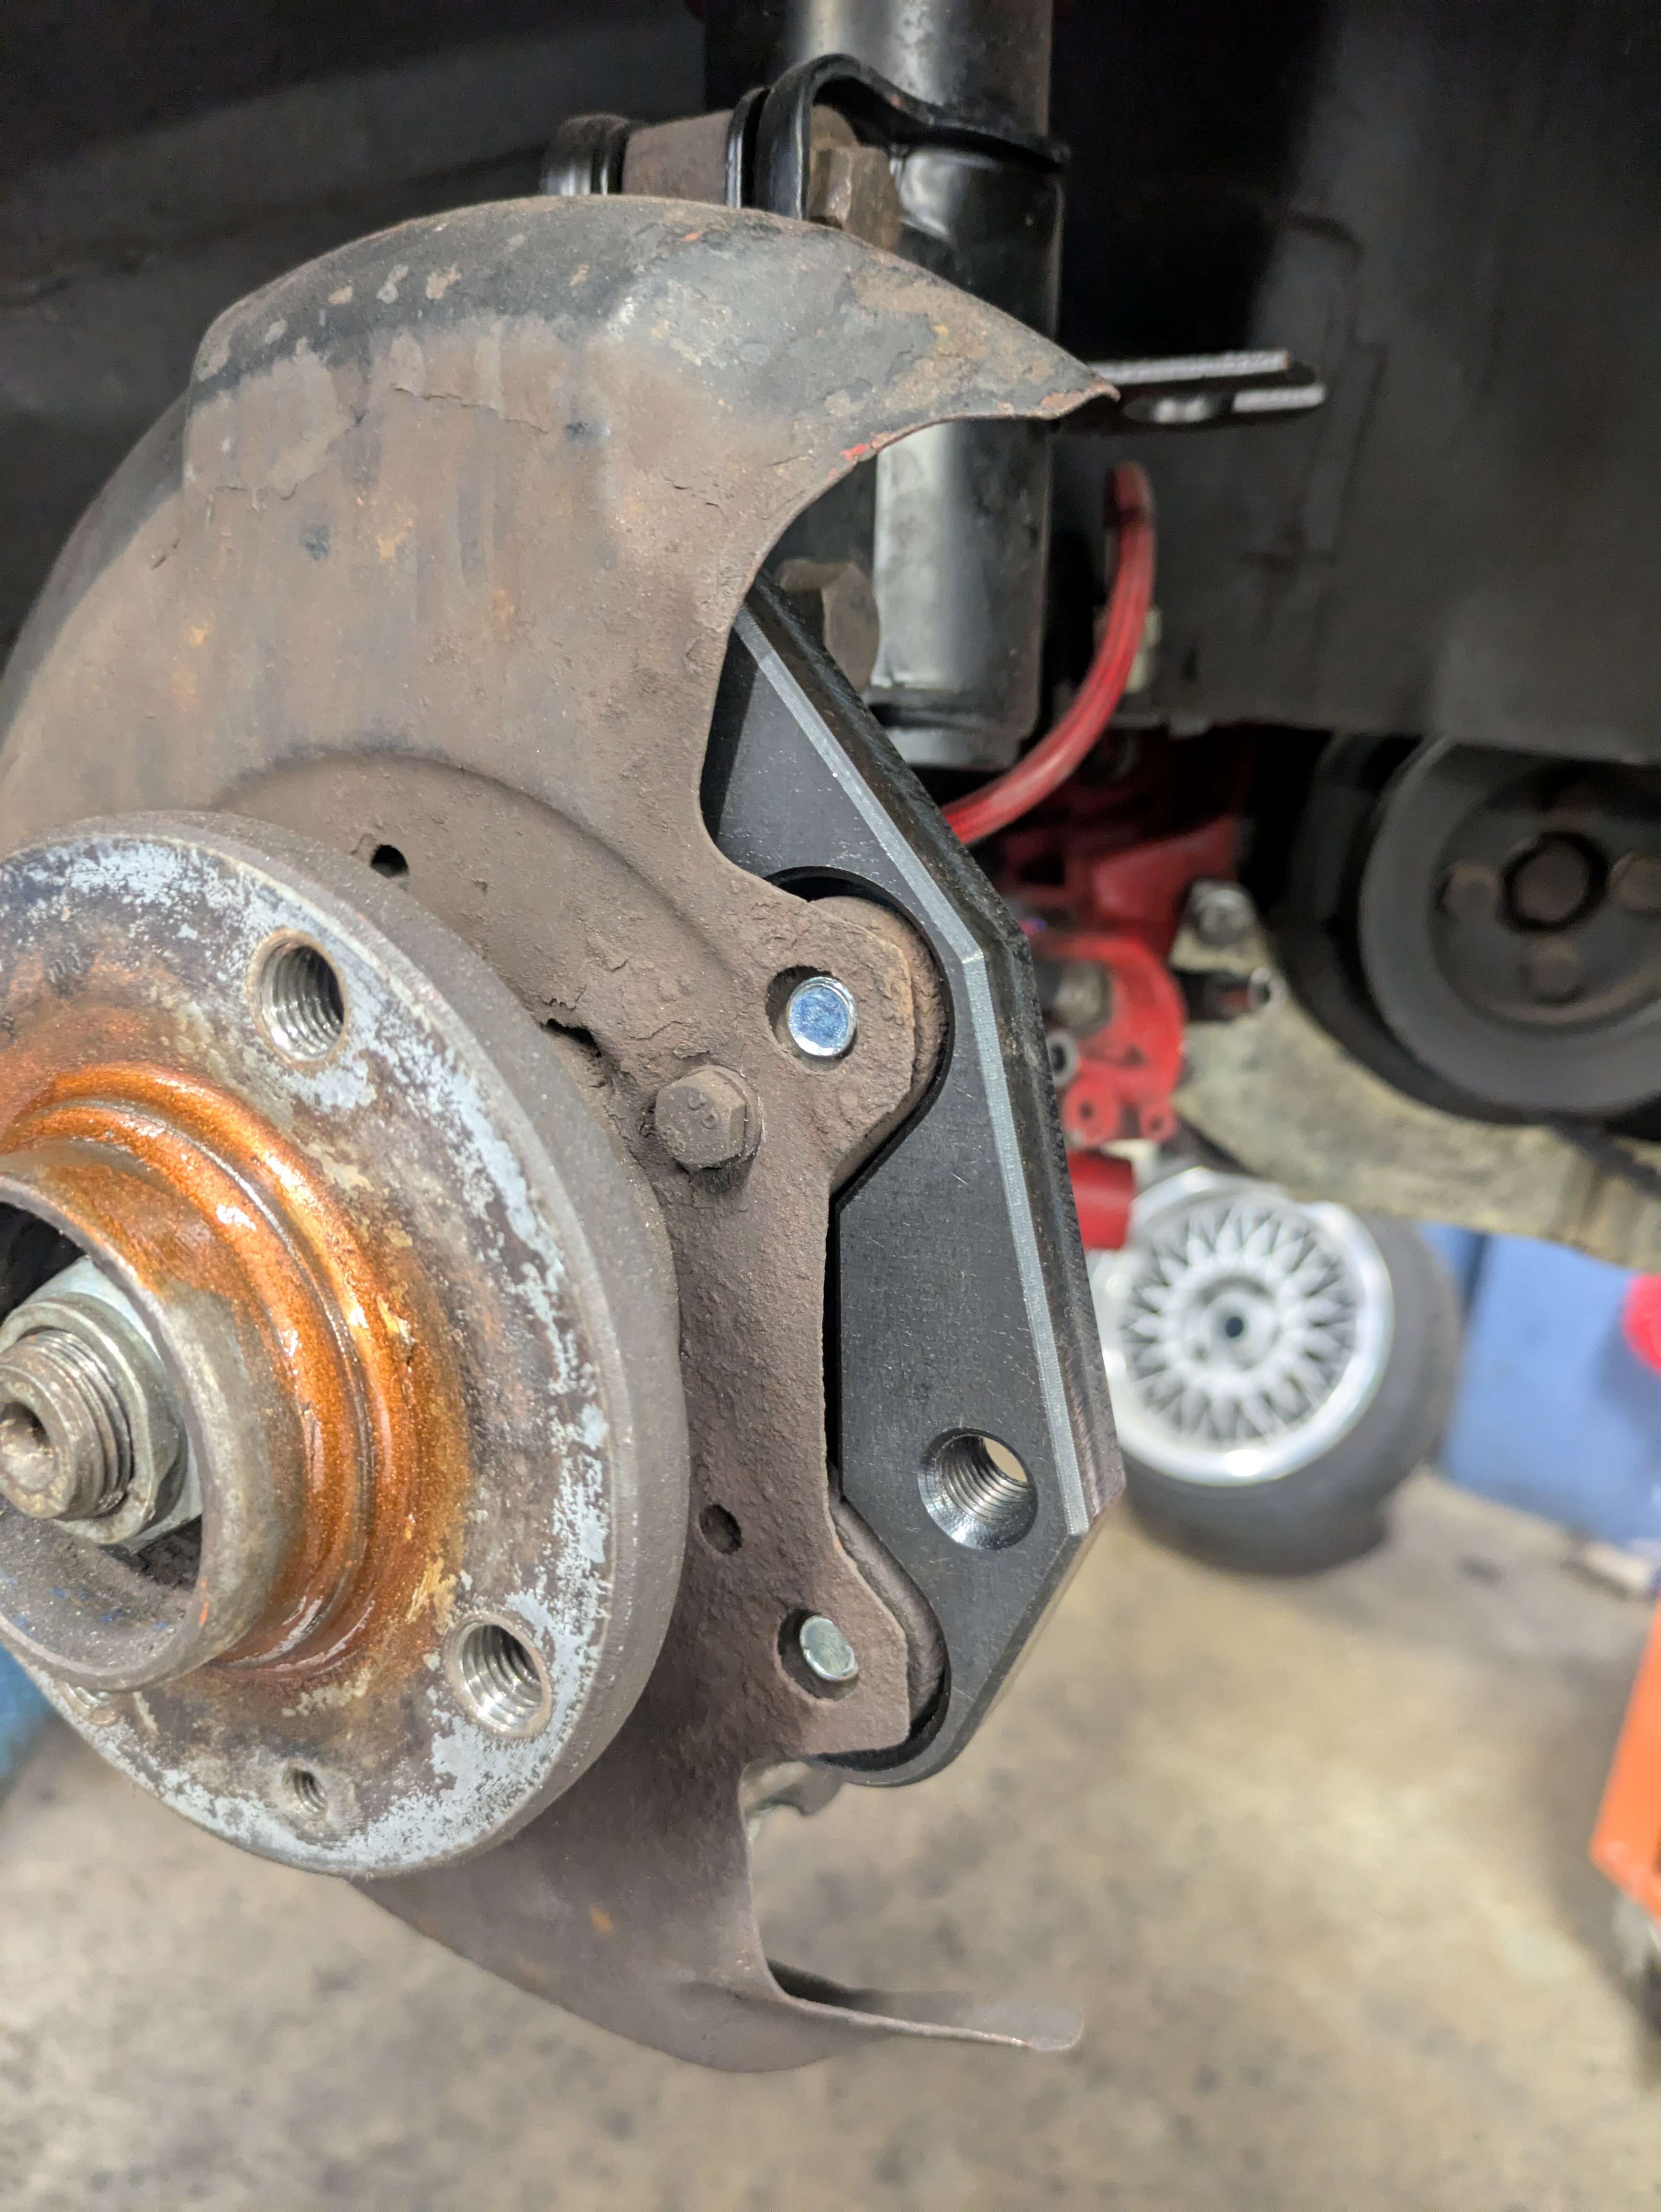
3.Checking the parallelism of the brake calliper mount:
Due to VW's manufacturing tolerances, the brake calliper mount must be checked for parallelism. An indication of unevenness is a visible air gap if the adapter is bolted to the steering knuckle with only one countersunk screw. If there is a gap on one side, the adapter is not fitting properly.
4. Correction of parallelism:
If a gap is found when checking the parallelism, a washer must be placed between the adapter and the brake calliper mount. Ideally, this should be done at the lower mounting hole. In this way, the previously non-existent parallelism is restored. A longer countersunk head screw must be used at the point where the washer is used. Alternatively, the brake calliper mount on the steering knuckle can be adapted.
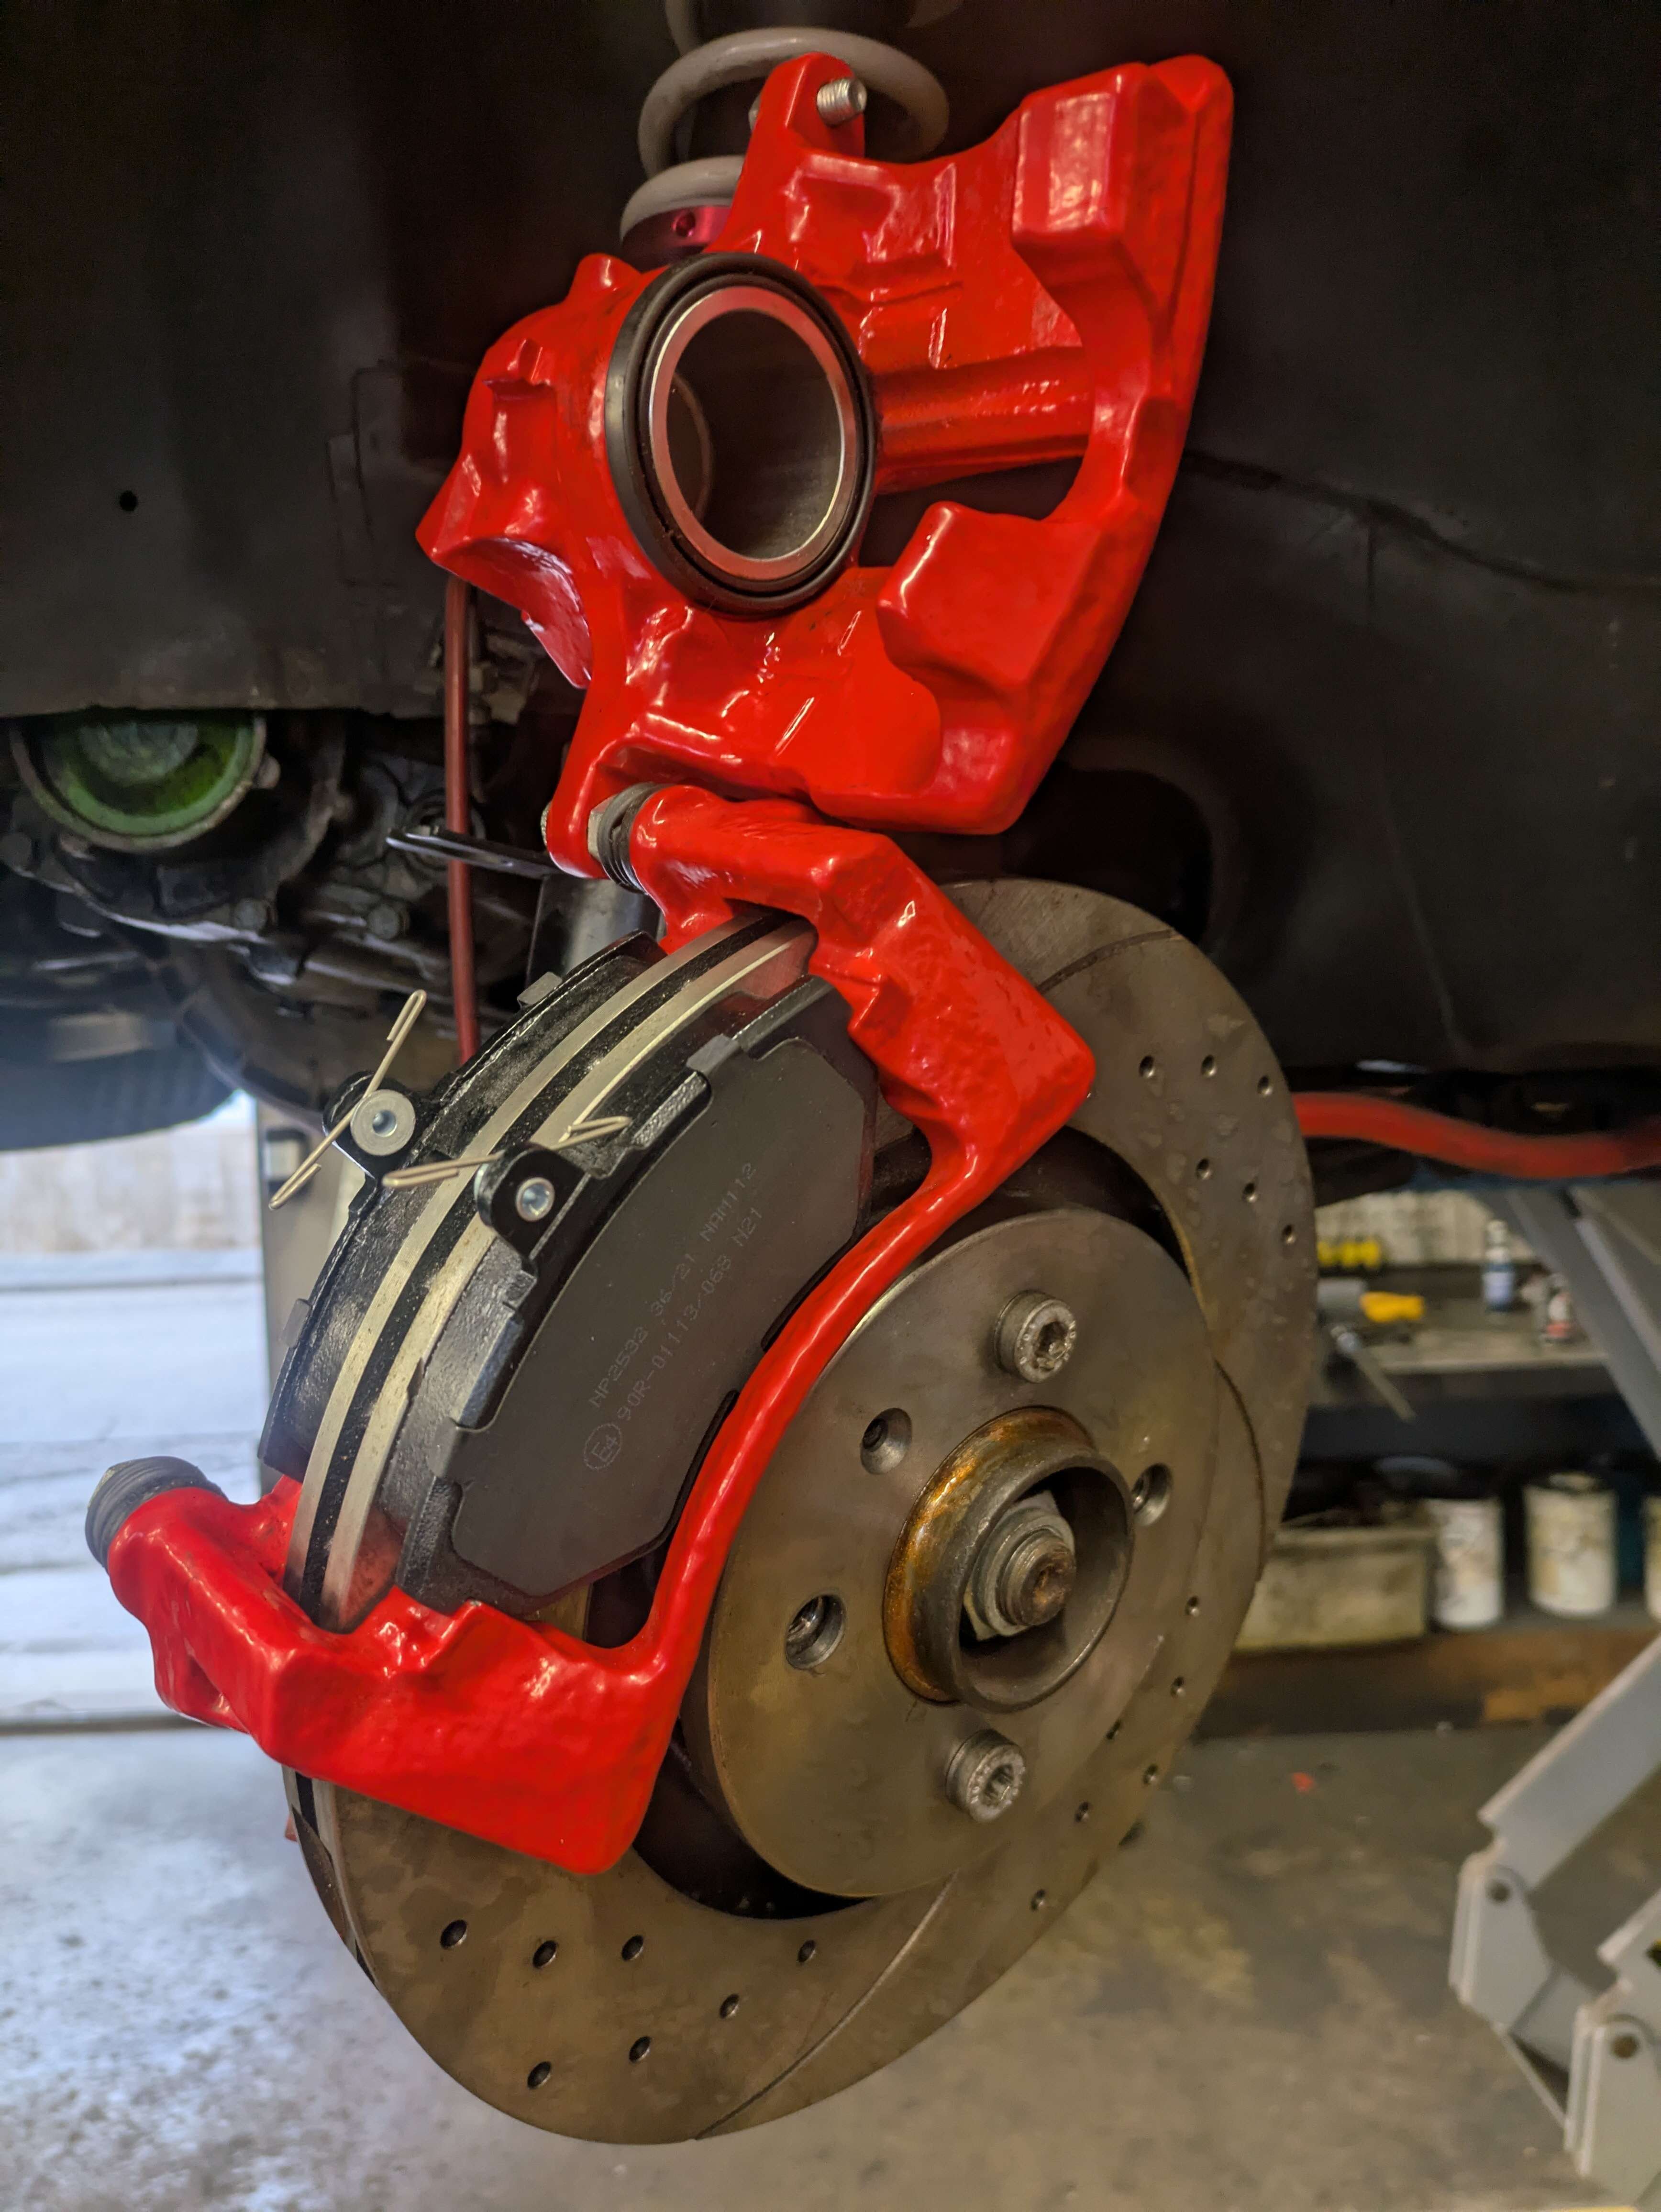
6. Fitting the new brake disc
Place the new 280 mm brake disc on the wheel hub. Make sure that the disc is clean and free of oil or grease. If necessary, secure the disc with a screw to prevent it from slipping.
7.Fitting the G60 brake calliper bracket:
Attach the G60 brake calliper carrier to the Epytec adapter. Use threadlocker here too and tighten the screws to the torque specified by the manufacturer.
8. Fitting the brake calliper:
Place the brake calliper on the brake calliper carrier and secure it with the corresponding screws. Make sure that the brake pads are correctly positioned and that the brake line is not twisted.
9. Connecting the brake line:
Connect the brake line to the new brake calliper. Make sure that the connection is tight and that no brake fluid is leaking.
10. Bleeding the brake system:
After the conversion, the brake system must be bled to remove air from the system. Open the bleeder valve on the brake calliper and carefully pump the brake until no more air bubbles escape. Make sure you keep an eye on the brake fluid level and top it up if necessary.
11. Final theses:
Check all screw connections for tightness and ensure that no components are loose. Fit the front wheels and tighten the wheel nuts to the specified torque. Lower the vehicle and carry out a careful test drive to test the function of the brake system.
Sources of error & Troubleshooting:
Grinding noises : If grinding noises occur after the conversion, check whether the brake calliper is centred over the brake disc. It may be necessary to use shim discs to adjust the distance correctly.
Soft brake pedal: A spongy pedal feel indicates air in the system. Repeat the bleeding process to ensure that there are no more air bubbles.
Unbalance during braking: If vibrations occur, check that the brake disc is correctly fitted and free of irregularities.
Disclaimer
Please note that this installation is carried out at your own risk. Epytec accepts no liability for damage or injury resulting from the execution of these instructions. Make sure that you understand all the steps and take the necessary safety measures.
And that's it! That's it!!
We hope that you have now successfully installed everything. If you have any questions or anything is unclear, please do not hesitate to contact us at. Click here to go directly to the contact form
About Epytec
Epytec is a leading specialist in the manufacture of tuning adapters, with more than 17 years of experience in the industry. Our products, which are manufactured entirely in Germany, stand for quality and innovation. Tuning adapters are essential connectors between car parts that make it possible to combine components from different vehicles. Our adapters make it possible, for example, to adapt a high-performance Porsche brake to a Golf GTI or to install a powerful Audi engine in a VW Transporter. This flexibility enables individual adaptations and optimisations that would otherwise not
Our commitment to the highest quality standards and the satisfaction of our customers is also reflected in our service. We guarantee trouble-free registration with the TÜV, which gives our customers security and confidence in the legality of their conversions. This combination of first-class products and excellent customer service has made Epytec a market leader that inspires hobby tuners as well as professional mechanics and vehicle builders. With Epytec, you are opting for proven technology "Made in Germany" that not only makes your vehicle more powerful, but also more
Click here for the matching products

- ✓ 280x22 535615301 G60 brake disc
- ✓ 1-piston Girling 54 443615124A / 443615123A brake caliper
- ✓ front axle

- ✓ 280x22 535 615 301 G60 brake disc
- ✓ G60 ATE / Girling 54 brake caliper
- ✓ front axle

- ✓ Length: 32cm
- ✓ M10x1 curved on the outside
- ✓ M10x1 straight on the inside