


Allgemeine Einbauanleitung für den Bremsanlagenumbau auf die Porsche Bremsanlage mit separaten Handbremssattel an der Hinterachse
General installation instructions for brake system conversion to the Porsche brake system with separate handbrake caliper
Scope of delivery of the rear axle kits
- 2x Porsche brake caliper
- Matching set of brake disks
- Ceramic brake pads
- brake caliper adapter
- matching steel flex lines
- Mounting aid for brake disk assembly
- High-strength screw material
Please note
Please read these instructions carefully before starting work. If the conversion is too difficult for you, please commission a specialist garage to carry out the installation. We cannot accept any liability for consequential damage caused by improper installation. Correct installation and adjustment saves time, costs and trouble
Disassembly:
- Old brake system (brake disc, brake caliper and brake caliper carrier)
- Remove or process the air baffle or brake baffle or anchor plate (we prefer removal, as the ventilation of the brake is better ensured). !!!Important!!
!!Important!!
What do you need to do that?
- Depending on your technical knowledge, about 1-2 hours of time
- Torque spanner with suitable attachments
- Liquid threadlocker
Dismantle the old brake system:
Jack up the car or use a lifting platform

Remove the rim

Remove the original brake system (sample images)

Disconnect / unplug electronic handbrake and ABS sensor (1 cable with 2 connectors, only if available).
Once the screws have been removed, the connector of the electronic handbrake and ABS sensor must be disconnected (red arrows).

After that, the attachment must be loosened. The best way to do this is to use a slotted screwdriver and clip it out of the fuse.

Then you can simply pull the brake calliper off the brake disc.
If the brake calliper is a little tighter, simply use a large flat-blade screwdriver to push it between the brake calliper and the brake disc and then push the brake calliper away from the brake disc with a minimum of force.

Remove the old brake disc and the heat shield (loosen ABS sensor using multi-tooth)

Now you can remove the heat shield by removing the 3 fastening screws (see red markings). Then you can simply pull it down over the wheel hub.


Once the screw is loosened, you can take it out.


Now the heat shield is freely accessible and you can simply pull it off over the stub axle.


When this is done, you can slide the wheel hub back onto the axle journal and repeat the whole process in reverse order.
First push the hub back on, tighten the bolt, and lightly push the grease cap back on if it is too loose.
Remove dirt and rust from the wheel hub and the mounting points on the axle
Now you should clean the wheel hub and the mounting points of the adapter on the axle with an angle grinder with a wire brush attachment, for example, so that you have a clean and flat contact surface and an optimal fit for the adapter is given.
If you don't have an angle grinder, you can also use a conventional wire brush.

Installation of the new brake system
Now you can put the centring ring for the brake disc on the wheel hub so that the brake disc is optimally centred on the wheel hub and you have no play.

Now the "large" tuning adapter must be screwed to the axle mount with the supplied screws and the spacer bushes, but not yet tightened.
The engraving must point towards the engine compartment, then you know that the tuning adapter is correctly mounted. This also has the advantage that the engraving can be easily read by the TÜV inspector from the inside (underneath the car) and is not covered by the brake disc.
Important! Do not forget to use threadlocker!

The brake caliper carrier is then attached to the "small" adapter . This must be done in advance, as it is not possible to tighten the screws later. The supplied screws must be used for fastening.
Important! Do not forget to use threadlocker!

.

Fitting the brake disc
As soon as both Epytec Tuning Adapters are mounted, you can mount the brake disc on the wheel hub. To do this, slide the brake disc sideways over the wheel hub and insert it into the handbrake caliper carrier.

Now you can first check the brake disc for free movement. The brake disc should be easy to turn and should not drag anywhere.

Fitting the electronic handbrake caliper
Fill the handbrake caliper with brake fluid and close the hydraulic connection with the plug.
Click here to go directly to the plug (click here).
Then you can mount the electronic handbrake caliper and reconnect it to the electronics.
Although the handbrake caliper sits further out, the cables do not need to be lengthened, they still fit :)
!! Tip !!

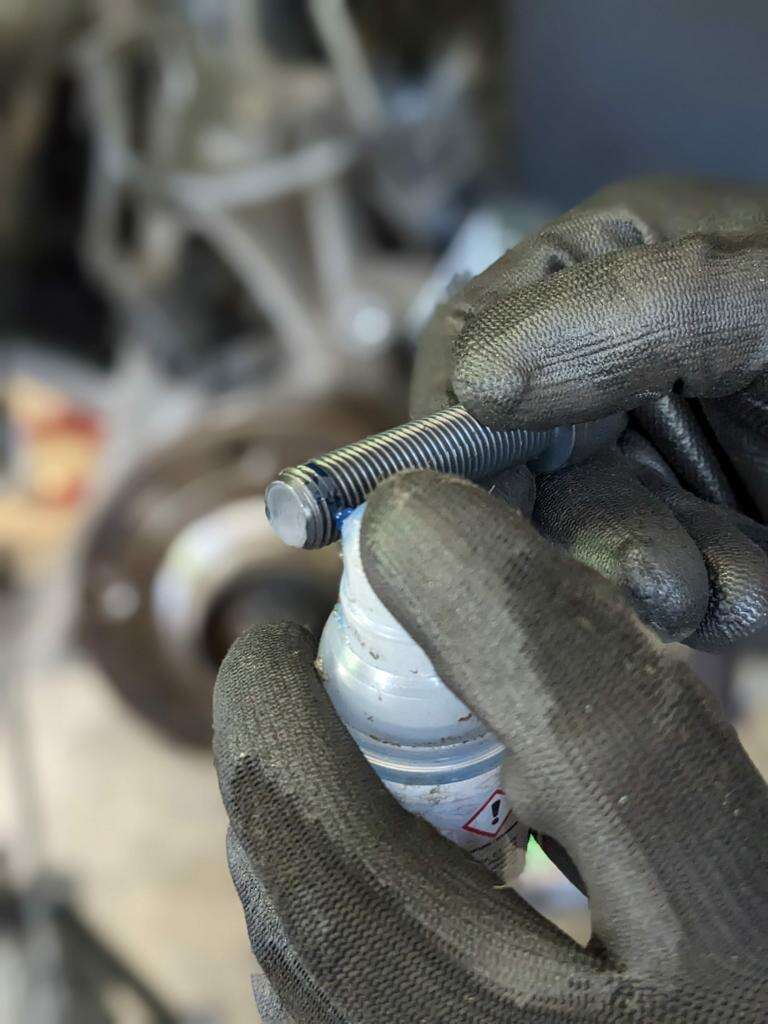
Grease brake pads and guide pins with brake paste
!! Important!!
Do not apply grease to the direct brake pads, but only to the top of the guide (blue arrow) brake pads.
This has the following advantages:
- Squeaking noises reduced
- Prevents corrosion
- Improves braking performance (brake pads have less friction and slide more evenly on the caliper)
- By preventing corrosion, brake pad replacement is much easier and quicker.
Simply apply the paste to the left and right of the brake pad on the contact surface.

Here on the left photo you can see how the paste is applied to the 4 locking bolts. The guide bolts of the handbrake caliper should also be greased a little so that they slide easily onto the carrier (right photo)


Fitting the brake pads in the handbrake calliper
Now you can insert the brake pads into the handbrake calliper carrier.


Finally, fit the retaining clip to the handbrake caliper so that the brake pads cannot start to "flutter

Fitting 4-piston Porsche brake calliper without pads
!! Important !!
Before mounting the caliper, make sure that the pistons are fully retracted so that the caliper can be mounted cleanly on the brake disc.
If the pistons are still sticking out a little, you can simply push them inwards by hand, as the brake callipers are still empty and not yet connected to the hydraulics :)


Fitting the pads and retaining clips in the 4-piston Porsche brake calliper
When the 4-piston Porsche brake caliper is mounted, the pads can now be inserted from above. The big advantage here is that you don't have to remove the brake callipers if you want to change the brake pads :)

Once the pads are in place, you can attach the retaining clips.

Checking the brake disc for free movement and steering angle
As soon as the brake caliper has been mounted on the new brake disc, you can check the brake disc for free movement and steering angle and whether anything is rubbing against it when the steering wheel is fully turned. To do this, it is best to turn it completely to the left and right to check whether anything is in the way, e.g. suspension joint, wishbone, etc.
Dismantle the old brake line and brake calliper.
Now you can completely remove the old brake caliper and the old brake line. To remove the brake line, first carefully loosen the retaining clip on the vehicle side and remove it from the guide bracket behind the brake disc. Then the brake line can be removed from the old brake calliper and the brake calliper can be finally dismantled.

Fitting the new steel braided line


Bleeding the brake system
Once the steel braided lines and the brake system have been refitted, the brake system must be bled. This means that all the air must be removed from the brake system and the brake calipers filled with brake fluid.
It is best to do this in pairs and proceed as follows:
Check brake fluid
Make sure that there is enough brake fluid in the reservoir.

Bleeding

- Put a hose (preferably transparent, then you can see it better) on the bleed valve and immerse the end in a collection container with brake fluid.
- Then open the bleed valve slightly, now slowly press the brake pedal down to the floor and hold it there.
- Close the bleed valve again,
- the brake pedal can now be released.

This procedure must be repeated until no more air bubbles can be seen in the hose and the brake fluid runs evenly.
Make sure you keep checking the reservoir to see if there is enough brake fluid in it to prevent new air from being drawn in and getting back into the system.

Cleaning the brake disc and caliper

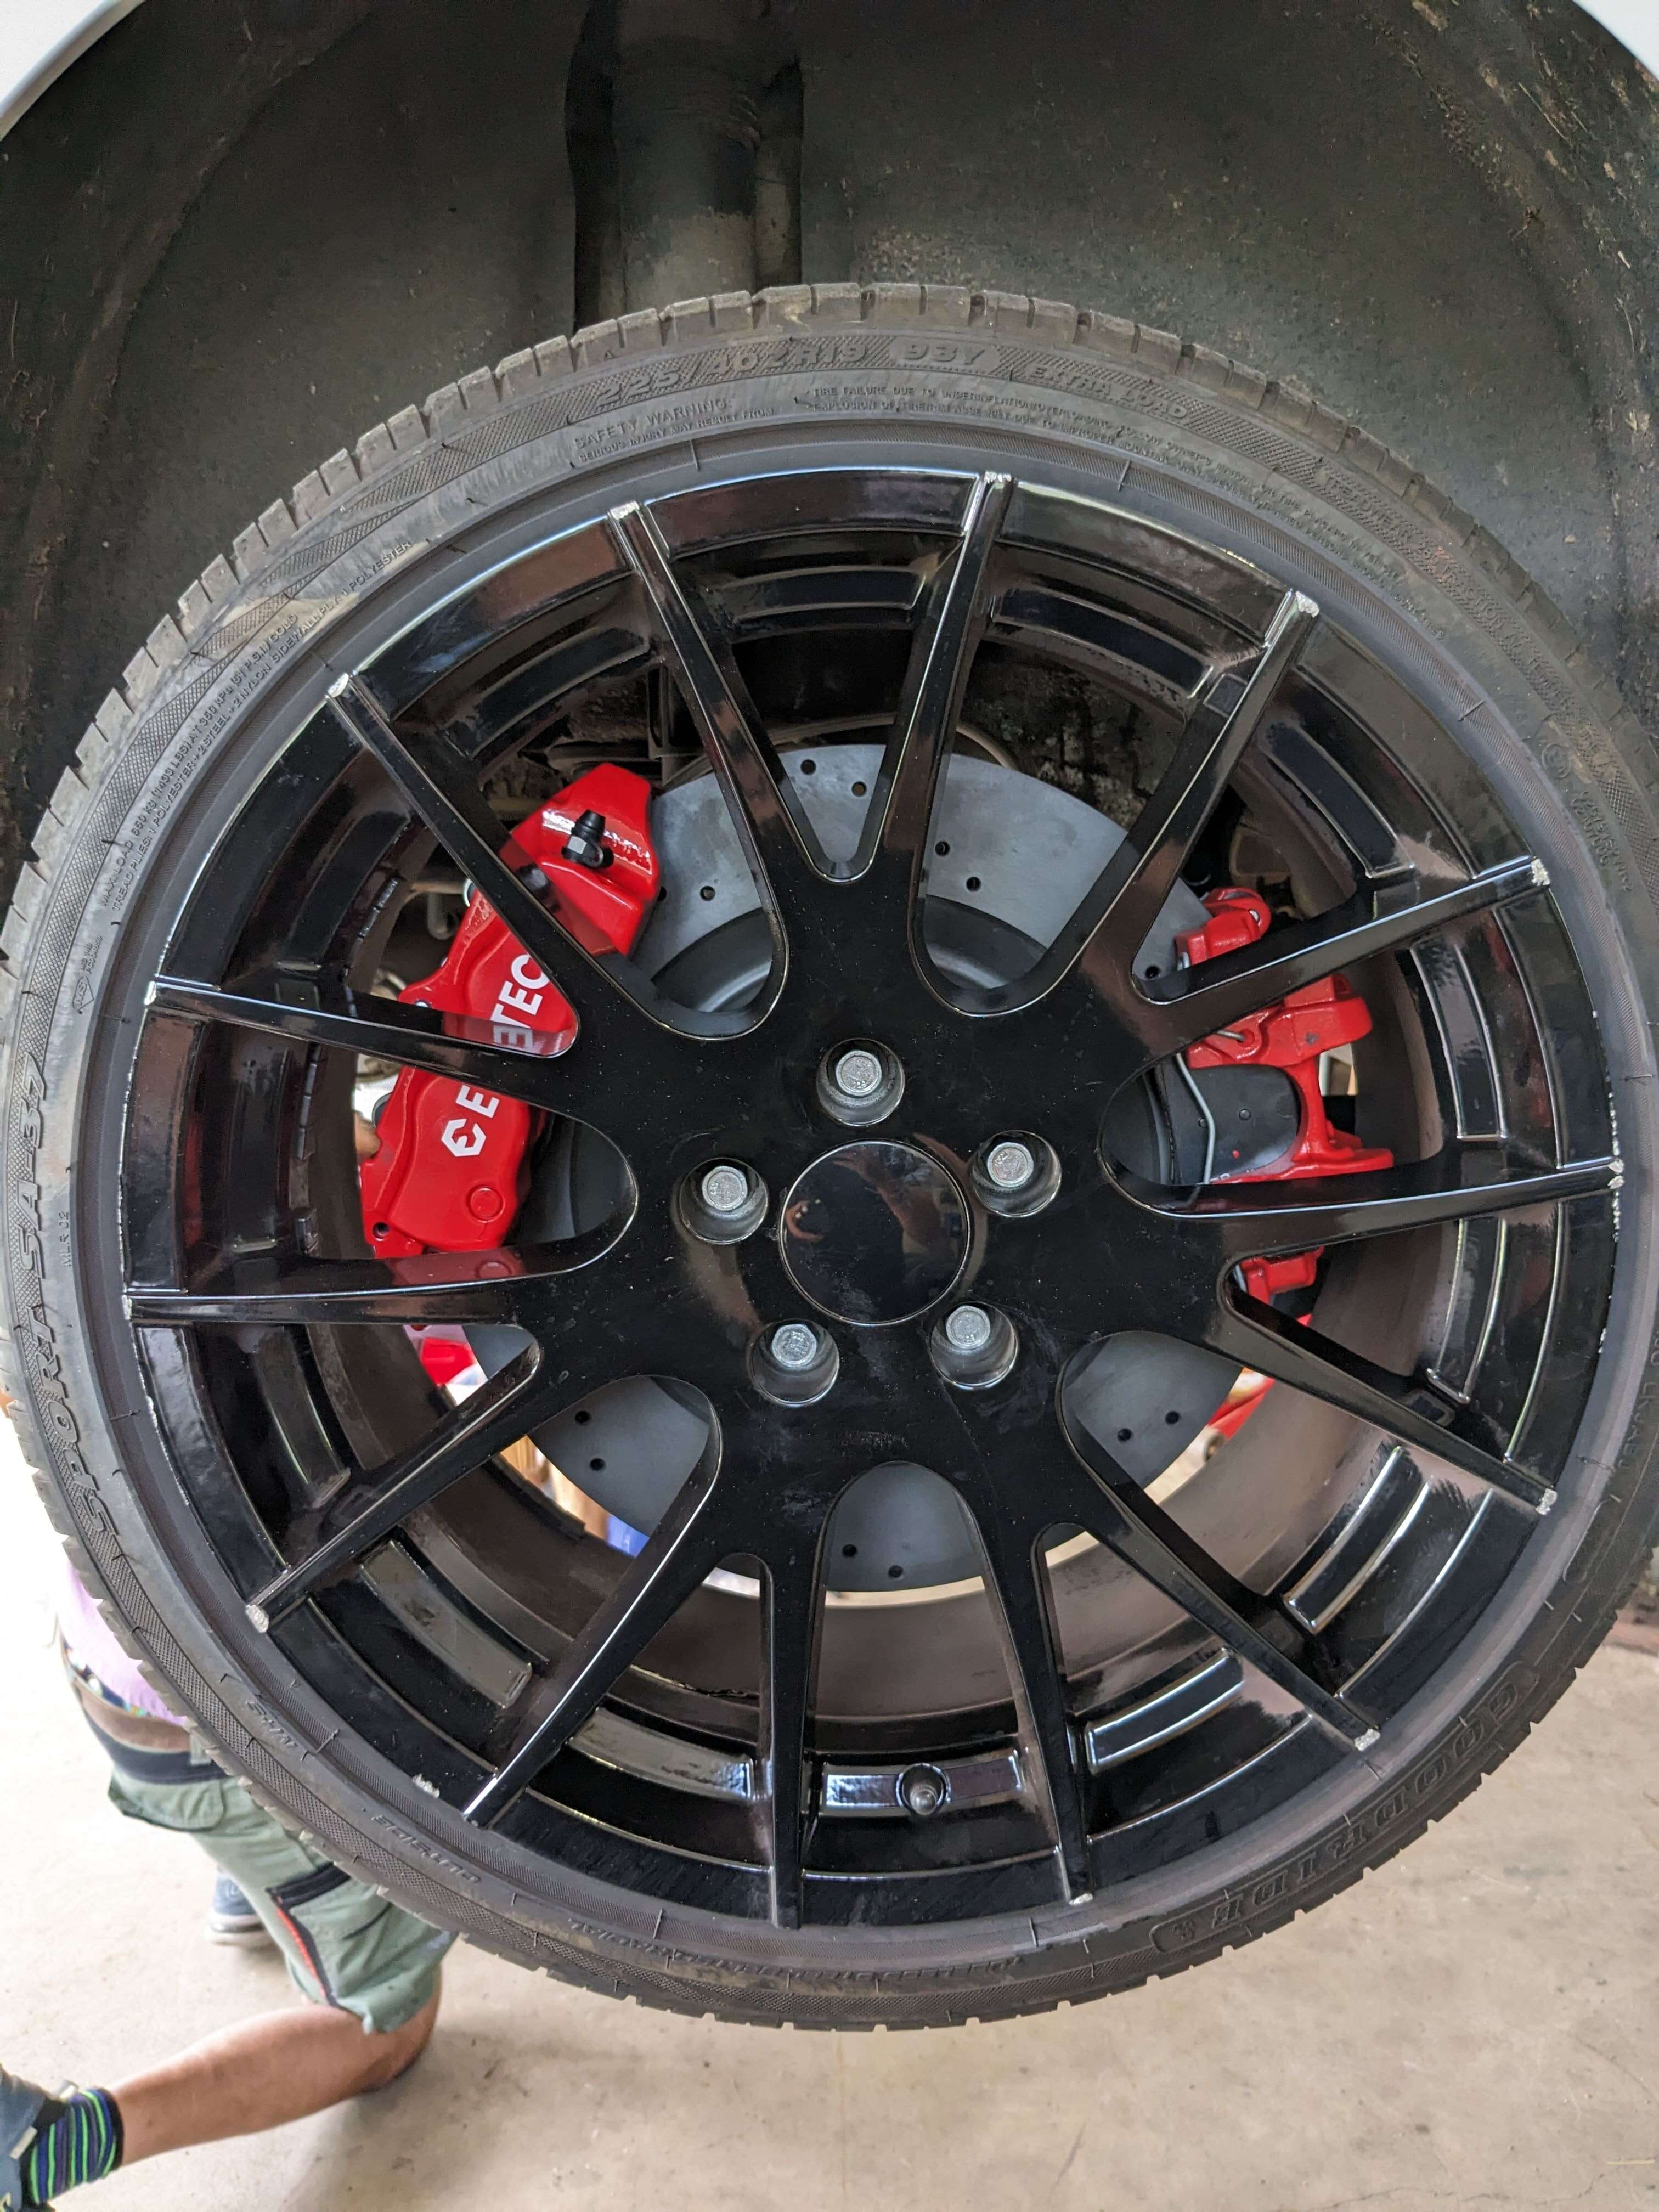
Check the clearance of the rim and brake calliper.
After the complete brake system has been cleaned, you can mount the rim.
!!Important!!

Finally, a small before and after comparison
